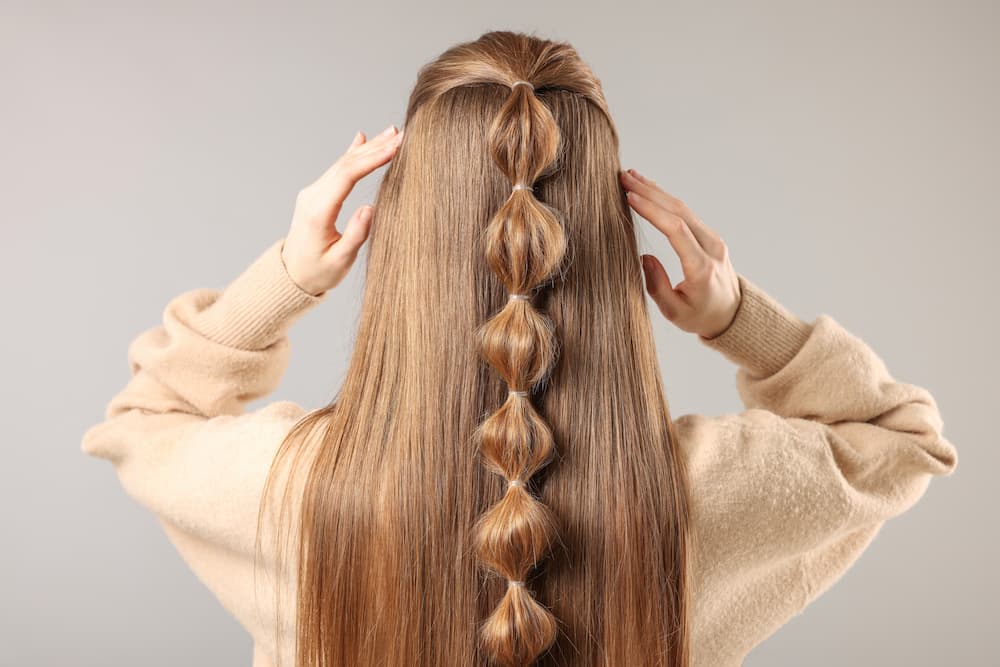
Bubble braids. They're everywhere these days, aren't they? As a hairstylist with more years under my belt than I care to admit, I've seen trends come and go. But this one? It's got legs. And why not? It's fun, versatile, and surprisingly simple to pull off once you get the hang of it.
What You'll Need
First things first, let's talk tools:
- Hair ties. Lots of 'em. No, more than that.
- A sturdy brush or comb
- Hairspray (if that's your thing)
- Bobby pins (because you never know)
- A mirror setup that lets you see the back of your head
Now, about those hair ties. I'm a big fan of the Skinny Mini set from Shop Hotline. Why? They grip without ripping. Your hair will thank you later.
Step by Step
- Dry hair is your friend here. Second-day hair? Even better. It's got that lived-in texture that holds like a dream.
- Brush it out. Thoroughly. I promise those knots you ignore now will come back to haunt you.
- Section time. Grab the top half of your hair. How much? That's up to you. I usually go from just above the ears, but I play around with it.
- Secure that section about an inch from your scalp. Snug, but not headache-inducing tight.
- Now for the fun part. Take another tie and secure it an inch below the first. This is where the magic happens.
- Gently - and I mean gently - pull at the hair between those ties. Voila! Your first bubble. Fluffy is good. Frizzed out? Not so much.
- Keep going. Tie, pull, repeat. The number of bubbles you end up with depends on your hair length and how big you make each section.
- Last tie at the end. Don't forget this step, or all your hard work will fall apart.
- Hairspray? That's your call. Give it a spritz if you want it to last through an apocalypse (or just a windy day).
Here's a little secret: my first attempt looked like I'd stuck my finger in an electrical socket. But stick with it. Practice makes perfect, right?
Mixing It Up
Mastered the basics? Time to get creative:
- Double trouble: Two bubble braids side by side. It's a showstopper.
- Braid base: Start with a regular braid, then bubble it up. The texture is insane.
- Lived-in look: Once done, gently mess it up a bit. Effortlessly chic, I call it.
- Micro-bubbles: Tiny ties, tiny bubbles. It's delicate and oh-so-pretty.
- Bling it on: Clips, flowers, ribbons between bubbles. Why not?
Accessorize
The right accessories can take your bubble braid from cute to jaw-dropping:
- Those Skinny Mini ties I mentioned? Perfect for every day.
- Fancy event? Try a delicate headband at the hairline.
- Feeling playful? Pop some colorful clips between bubbles.
- Festival season? Weave in some small flowers. Trust me, it's a mood.
Pro tip: Always, always carry extra ties. I learned this the hard way at a beachside wedding. Let's just say the bride was not amused when my carefully crafted style came undone mid-ceremony.
Look, here's the deal: hairstyling is part skill, part art, and a lot of practice. Your first bubble braid might look more "burst pipe" than "fashion forward." That's okay! Mine did, too. Keep at it. Before you know it, you'll be bubbling up your hair while half asleep (not that I've ever done that).
And remember, if all else fails, there's always the trusty, messy bun. But between you and me? You've got this. Now go forth and bubble! Just follow the steps I gave you, and you can figure it out. It might just take some time.
Image Source: New Africa/Shutterstock

